The Unix Shell
Overview
Teaching: 60 min
Exercises: 15 minQuestions
What is a command shell and why would I use one?
How can I move around on my computer?
How can I see what files and directories I have?
How can I specify the location of a file or directory on my computer?
How can I create, copy, and delete files and directories?
How can I edit files?
Objectives
Explain how the shell relates to users’ programs.
Explain when and why command-line interfaces should be used instead of graphical interfaces.
Construct absolute and relative paths that identify specific files and directories.
Demonstrate the use of tab completion and explain its advantages.
Create a directory hierarchy that matches a given diagram.
Create files in the directory hierarchy using an editor or by copying and renaming existing files.
Delete, copy, and move specified files and/or directories.
Contents
Introducing the Shell
Motivation
Usually you move around your computer and run programs through graphical user interfaces (GUIs). For example, Finder for Mac and Explorer for Windows. These GUIs are convenient because you can use your mouse to navigate to different folders and open different files. However, there are some things you simply can’t do from these GUIs.
The Unix Shell (or the command line) allows you to do everything you would do through Finder/Explorer, and a lot more. But it’s so scary! I thought so at first, too. Since then, I’ve learned that it’s just another way to navigate your computer and run programs, and it can be super useful for your work. For instance, you can use it to combine existing tools into a pipeline to automate analyses, you can write a script to do things for you and improve reproducibility, you can interact with remote machines and supercomputers that are far away from you, and sometimes it’s the only option for the program you want to run.
We’re going to use it to:
- Organize our R code and plots from the R plotting lesson.
- Perform version control using git during the rest of the workshop.
What the Shell looks like
When you open up the terminal for the first time, it can look pretty scary - it’s basically just a blank screen. Don’t worry - we’ll take you through how to use it step by step.
The first line of the shell shows a prompt - the shell is waiting for an input. When you’re following along in the lesson, don’t type the prompt when typing commands. To make the prompt the same for all of us, run this command:
PS1='$ '
Tree Structure
The first thing we need to learn when using the shell is how to get around our computer.
The shell folder (directory) structure is the same file structure as you’re used to.
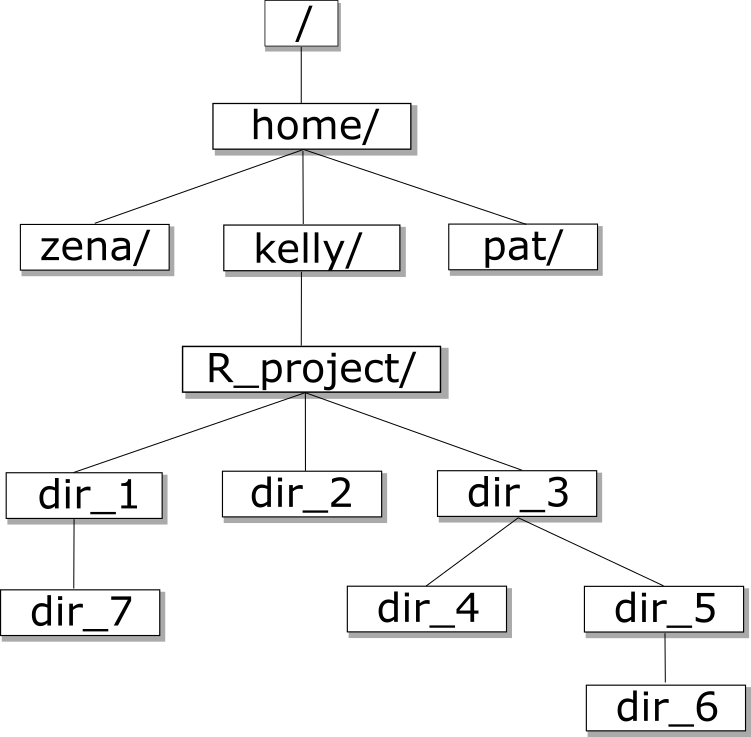
We call the way that different directories are nested the “directory tree”.
You start at the root directory (/) and you can move “up” and “down” the tree. Here’s an example:
Now that we understand directory trees a bit, let’s check it out from the command line.
We can see where we are by using the command pwd which stands for “print working directory”, or the directory we are currently in:
pwd
/home/USERNAME/
Congrats! You just ran your first command from the command line. The output is a file path to a location (a directory) on your computer.
The output will look a little different depending on what operating system you’re using:
- Mac:
/Users/USERNAME - Linux:
/home/USERNAME - Windows:
/c/Users/USERNAME
Let’s check to see what’s in your home directory using the ls command, which lists all of the files in your working directory:
ls
Desktop     Downloads   Movies      Pictures
Documents   Library     Music       Public
You should see some files and directories you’re familiar with such as Documents and Desktop.
If you make a typo, don’t worry. If the shell can’t find a command you type, it will show you a helpful error message.
ks
ks: command not found
This error message tells us the command we tried to run, ks, is not a command that is recognized, letting us know we might have made a mistake when typing.
Man and Help
Often we’ll want to learn more about how to use a certain command such as ls. There are several different ways you can
learn more about a specific command.
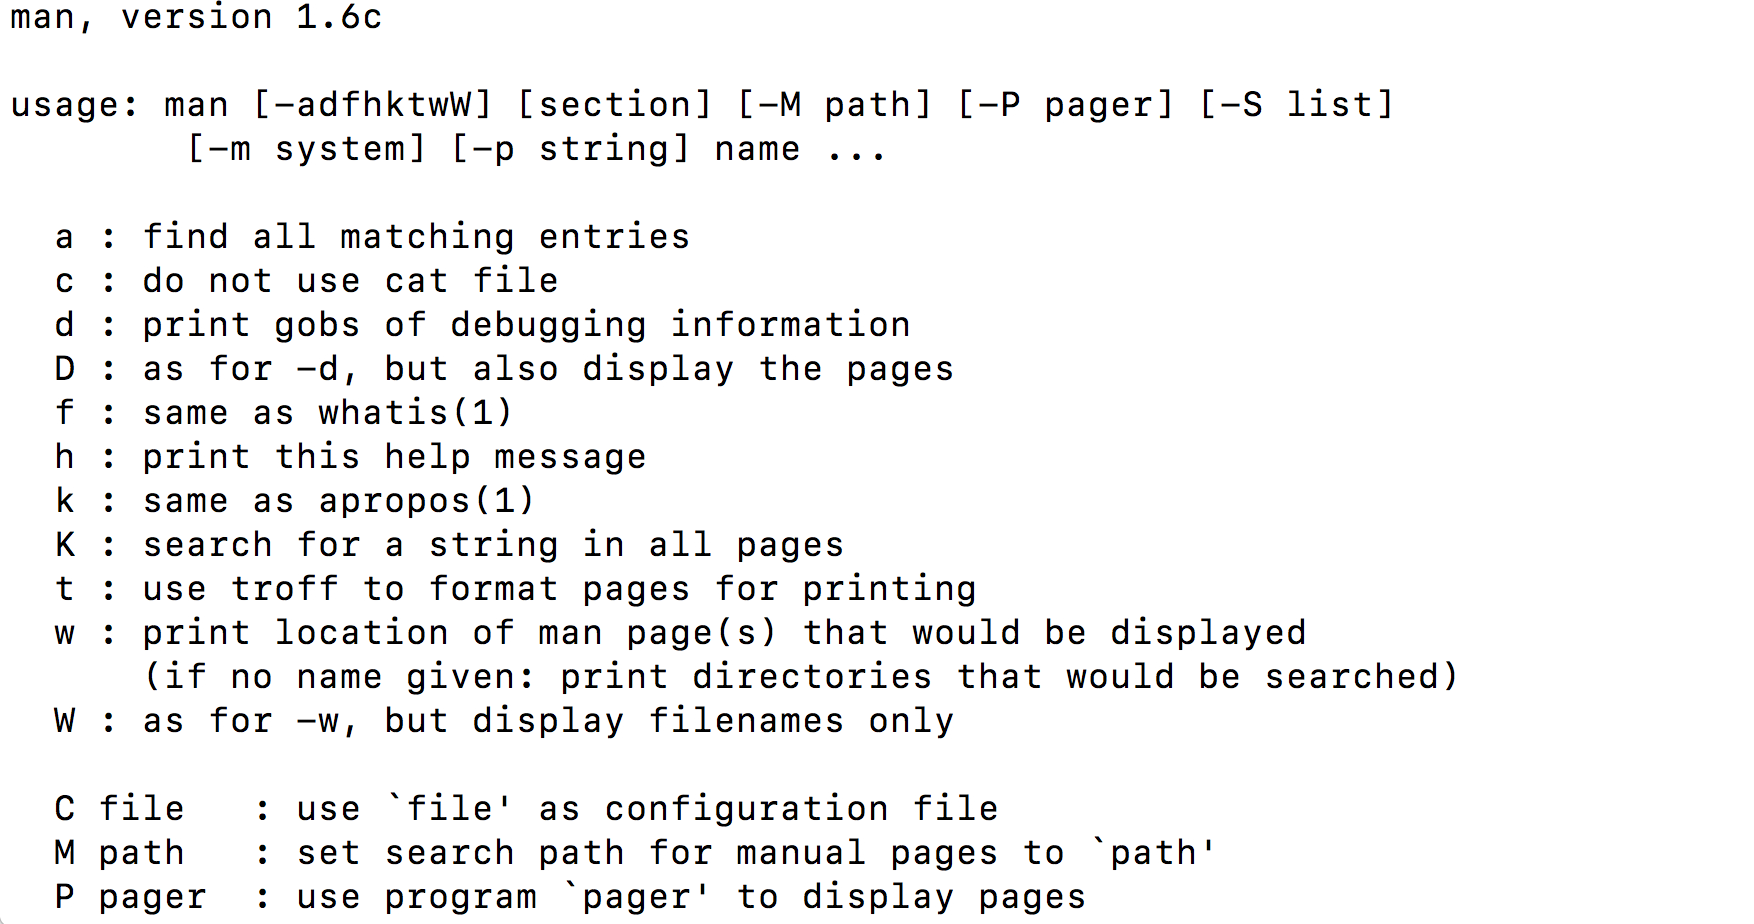
Some commands have additional information that can be found by using the -h or --help
flags. This will print brief documentation for the command:

man -h
man --help
Other commands, such as ls, don’t have help flags, but have manual pages with more information. We can navigate
the manual page using the man command to view the description of a command and its options. For example,
if you want to know more about the navigation options of ls you can type man ls on the command line:
man ls
On the manual page for ls, we see a section titled options. These options, also called flags, are similar to arguments in R functions, and allow us to customize how ls runs.
To get out of the man page, click q.
Sometimes, commands will have multiple flags that we want to use at the same time. For example,
ls has a flag -F that displays a slash after all directories, as well as a flag -a that
includes hidden files and directories (ones that begin with a .). There are two ways to run
ls using both of these flags:
ls -F -a
ls -Fa
Note that when we run the -a command, we see a . and a .. in the directory. The . corresponds to the current directory we are in and the .. corresponds to the directory directly above us in the directory tree. We’ll learn more about why this is useful in a bit.
Using the Manual Pages
Use
manto open the manual for the commandls.What flags would you use to…
- Print files in order of size?
- Print files in order of the last time they were edited?
- Print more information about the files?
- Print more information about the files with unit suffixes?
- Print files in order of size AND also print more information about the files?
Solution
ls -Sls -tls -lls -lhls -lS
Next, let’s move to our Desktop. To do this, we use cd to change directories.
Run the following command:
cd Desktop
Let’s see if we’re in the right place:
pwd
/home/USERNAME/Desktop
We just moved down the directory tree into the Desktop directory.
What files and directories do you have on your Desktop? How can you check?
ls
list.txt
un-report
notes.pdf
Untitled.png
Your Desktop will likely look different, but the important thing is that you see the folder we worked in for the R plotting lesson.
Is the un-report directory listed on your Desktop?
How can we get into the un-report directory?
cd un-report
We just went down the directory tree again.
Let’s see what files are in un-report:
ls
awesome_plot.jpg
awesome_violin_plot.jpg
gapminder_1997.csv
gapminder_data.csv
gdp_population.R
Is it what you expect? Are the files you made in the R plotting lesson there?
Now let’s move back up the directory tree. First, let’s try this command:
cd Desktop
cd: Desktop: No such file or directory
This doesn’t work because the Desktop directory is not within the directory that we are currently in.
To move up the directory tree, you can use .., which is the parent of the current directory:
cd ..
pwd
/home/USERNAME/Desktop
Everything that we’ve been doing is working with file paths. We tell the computer where we want to go using cd plus the file path. We can also tell the computer what files we want to list by giving a file path to ls:
ls un-report
awesome_plot.jpg
awesome_violin_plot.jpg
gapminder_1997.csv
gapminder_data.csv
gdp_population.R
ls ..
list.txt
un-report
notes.pdf
Untitled.png
What happens if you just type cd without a file path?
cd
pwd
/home/USERNAME
It takes you back to your home directory!
To get back to your projects directory you can use the following command:
cd Desktop/un-report
We have been using relative paths, meaning you use your current working directory to get to where you want to go.
You can also use the absolute path, or the entire path from the root directory. What’s listed when you use the pwd command is the absolute path:
pwd
You can also use ~ for the path to your home directory:
cd ~
pwd
/home/USERNAME
Absolute vs Relative Paths
Starting from
/Users/amanda/data, which of the following commands could Amanda use to navigate to her home directory, which is/Users/amanda?
cd .cd /cd /home/amandacd ../..cd ~cd homecd ~/data/..cdcd ..Solution
- No:
.stands for the current directory.- No:
/stands for the root directory.- No: Amanda’s home directory is
/Users/amanda.- No: this goes up two levels, i.e. ends in
/Users.- Yes:
~stands for the user’s home directory, in this case/Users/amanda.- No: this would navigate into a directory
homein the current directory if it exists.- Yes: unnecessarily complicated, but correct.
- Yes: shortcut to go back to the user’s home directory.
- Yes: goes up one level.
Working with files and directories
Now that we know how to move around your computer using the command line, our next step is to organize the project that we started in the R plotting lesson You might ask: why would I use the command line when I could just use the GUI? My best response is that if you ever need to use a high-performance computing cluster (such as Great Lakes at the University of Michigan), you’ll have no other option. You might also come to like it more than clicking around to get places once you get comfortable, because it’s a lot faster!
First, let’s make sure we’re in the right directory (the un-reports directory):
pwd
/home/USERNAME/Desktop/un-reports
If you’re not there, cd to the correct place.
Next, let’s remind ourselves what files are in this directory:
ls
awesome_plot.jpg
awesome_violin_plot.jpg
gapminder_1997.csv
gapminder_data.csv
gdp_population.R
You can see that right now all of our files are in our main directory. However, it can start to get crazy if you have too many different files of different types all in one place! We’re going to create a better project directory structure that will help us organize our files. This is really important, particularly for larger projects. If you’re interested in learning more about structuring computational biology projects in particular, here is a useful article.
What do you think good would be a good way to organize our files?
One way is the following:
.
├── code
│   └── gdp_population.R
├── data
│   ├── gapminder_1997.csv
    └── gapminder_data.csv
└── figures
    ├── awesome_plot.jpg
    └── awesome_violin_plot.jpg
The R script goes in the code directory, the gapminder datasets go in the data directory, and the figures go in the figures directory. This way, all of the files are organized into a clearer overall structure.
A few notes about naming files and directories:
- Don’t use whitespaces because they’re used to break arguments on the command line, so it makes things like moving and viewing files more complicated.
Instead you can use a dash (
-) or an underscore (_). - Don’t start names with a dash (
-) because the shell will interpret it incorrectly. - Stick with letters, numbers, periods, dashes, and underscores, because other symbols (e.g.
^,&) have special meanings. - If you have to refer to names of files or directories with whitespace or other special characters, use double quotes. For example, if you wanted to change into a directory called
My Code, you will want to typecd "My Code", notcd My Code.
So how do we make our directory structure look like this?
First, we need to make a new directory. Let’s start with the code directory. To do this, we use the command mkdir plus the name of the directory we want to make:
mkdir code
Now, let’s see if that directory exists now:
ls
awesome_plot.jpg
awesome_violin_plot.jpg
code
gapminder_1997.csv
gapminder_data.csv
gdp_population.R
How can we check to see if there’s anything in the code directory?
ls code
Nothing in there yet, which is expected since we just made the directory.
The next step is to move the .R file into the code directory. To do this, we use the mv command. The first argument after mv is the file you want to move, and the second argument is the place you want to move it:
mv gdp_population.R code
Okay, let’s see what’s in our current directory now:
ls
awesome_plot.jpg
awesome_violin_plot.jpg
code
gapminder_1997.csv
gapminder_data.csv
gdp_population.R is no longer there! Where did it go? Let’s check the code directory, where we moved it to:
ls code
gdp_population.R
There it is!
Creating directories and moving files
Create a
datadirectory and movegapminder_data.csvandgapminder_1997.csvinto the newly createddatadirectory.Solution
From the
un-reportdirectory:mkdir data mv gapminder_data.csv data mv gapminder_1997.csv data
Okay, now we have the code and data in the right place. But we have several figures that should still be in their own directory.
First, let’s make a figures directory:
mkdir figures
Next, we have to move the figures. But we have so many figures! It’d be annoying to move them one at a time. Thankfully, we can use a wildcard to move them all at once. Wildcards are used to match files and directories to patterns.
One example of a wildcard is the asterisk, *. This special character is interpreted as “multiple characters of any kind”.
Let’s see how we can use a wildcard to list only files with the extension .jpg:
ls *jpg
awesome_plot.jpg
awesome_violin_plot.jpg
See how only the files ending in .jpg were listed? The shell expands the wildcard to create a list of matching file names before running the commands. Can you guess how we move all of these files at once to the figures directory?
mv *jpg figures
We can also use the wildcard to list all of the files in all of the directories:
ls *
code:
gdp_population.R

data:
gapminder_1997.csv  gapminder_data.csv

figures:
awesome_plot.jpg    awesome_violin_plot.jpg
This output shows each directory name, followed by its contents on the next line. As you can see, all of the files are now in the right place!
Working with Wildcards
Suppose we are in a directory containing the following files:
cubane.pdb
ethane.pdb
methane.pdb
octane.pdb
pentane.pdb
propane.pdb
README.md
What would be the output of the following commands?
ls *ls *.pdbls *ethane.pdbls *anels p*Solution
cubane.pdb ethane.pdb methane.pdb octane.pdb pentane.pdb propane.pdb README.mdcubane.pdb ethane.pdb methane.pdb octane.pdb pentane.pdb propane.pdbethane.pdb methane.pdb- None. None of the files end in only
ane. This would have listed files ifls *ane*were used instead.pentane.pdb propane.pdb
Viewing Files
To view and navigate the contents of a file we can use the command less. This will open a full screen view of the file.
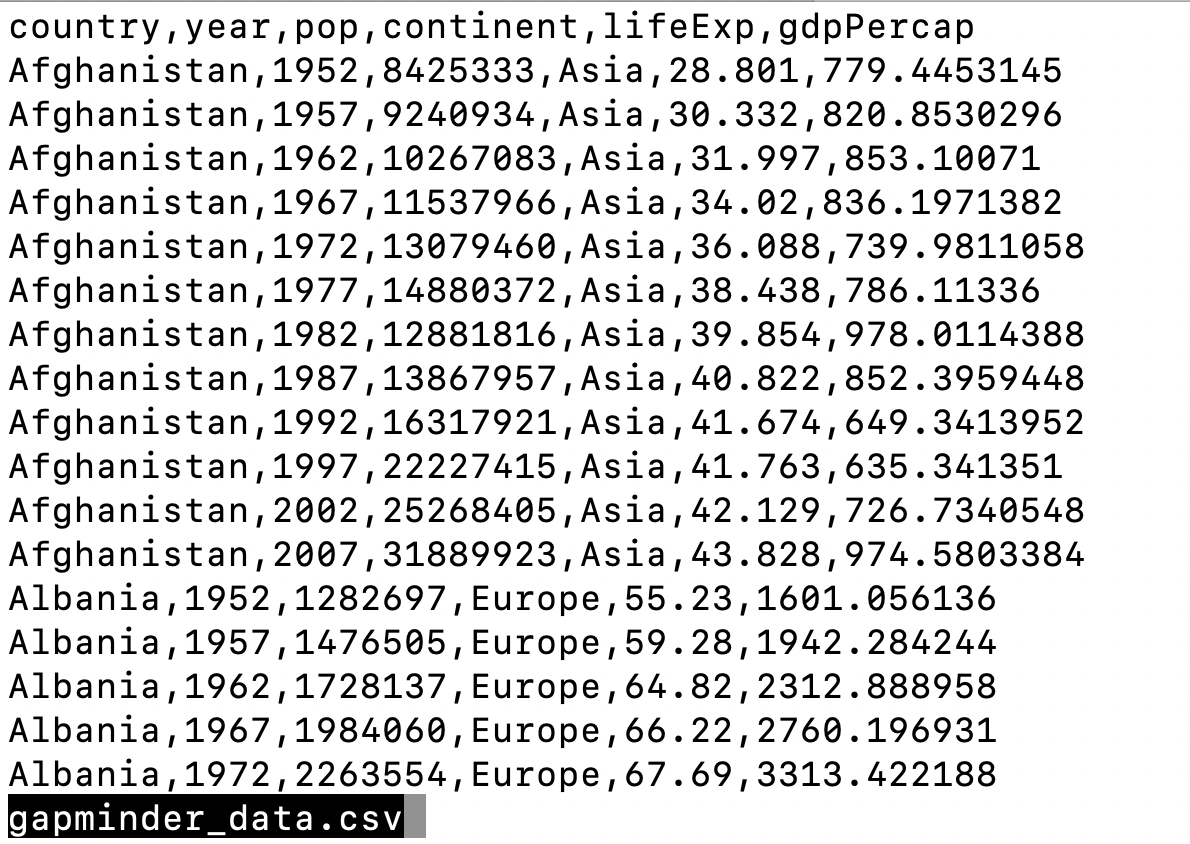
For instance, we can run the command less on our gapminder_data.csv file:
less data/gapminder_data.csv
To navigate, press spacebar to scroll to the next page and b to scroll up to the previous page. You can also use the up and down arrows to scroll line-by-line. Note that less defaults to line wrapping, meaning that any lines longer than the width of the screen will be wrapped to the next line. To exit less, press the letter q.
One particularly useful flag for less is -S which cuts off really long lines (rather than having the text wrap around):
less -S data/gapminder_data.csv
To navigate, press spacebar to scroll to the next page and b to scroll up to the previous page. You can also use the up and down arrows to scroll line-by-line. Note that less defaults to line wrapping, meaning that any lines longer than the width of the screen will be wrapped to the next line, (to disable this use the option -S when running less, ex less -S file.txt). To exit less, press the letter q.
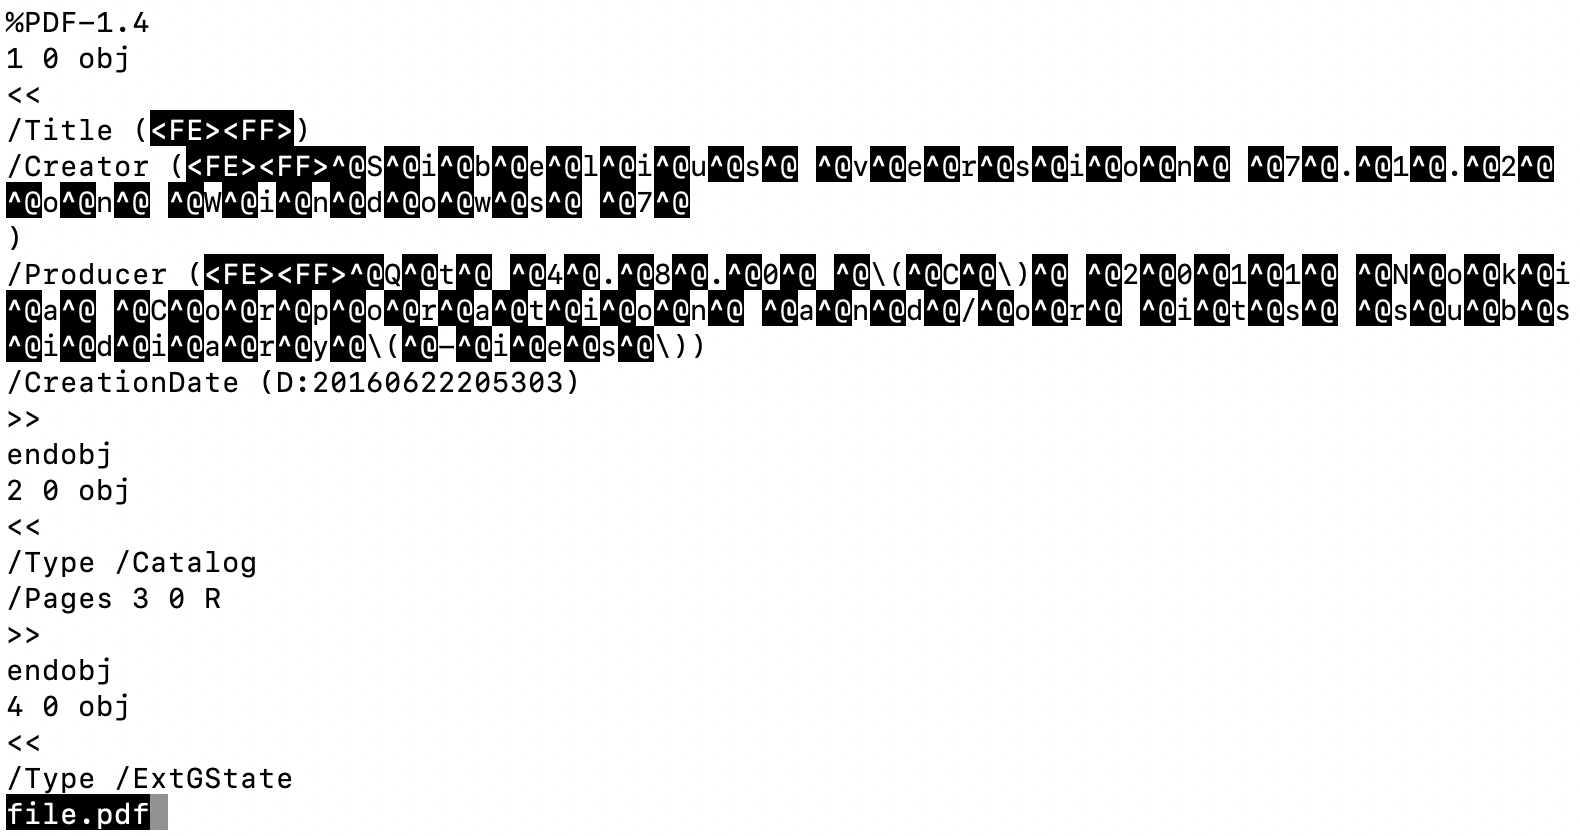
Note that not all file types can be viewed with less. While we can open PDFs and excel spreadsheets easily with programs on our computer, less doesn’t render them well on the command line. For example, if we try to less a .pdf file we will see a warning.
less figures/awesome_plot.jpg
figures/awesome_plot.jpg may be a binary file. See it anyway?
If we say “yes”, less will render the file but it will appear as a seemingly random display of characters that won’t make much sense to us.
Editing Files
Beyond viewing the content of files, we may want to be able to edit or write files on the command line. There are many different text editors you can use to edit files on the command line, but we will talk about nano since it is a bit easier to learn. To edit a file with nano type nano file.txt. If the file exists, it will open the file in a nano window, if the file does not exist it will be created. One nice feature of nano is that it has a cheat sheet along the bottom with some common commands you’ll need. When you are ready to save (write) your file, you type Ctrl+O. Along the bottom will appear a prompt for the file name to write to. The current name of the file will appear here, to keep the name as it is hit enter otherwise you can change the name of the file then hit enter. To exit nano, press Ctrl+X. If you forget to save before exiting, no worries nano will prompt you to first save the file.
Since we moved around files when we organized our project directory we will have to update our R script. The path we use to read in our dataset is no longer correct. We will use nano to update the path to our new directory structure.
nano code/gdp_population.R
gapminder_data <- read_csv("data/gapminder_data.csv")
Great! Now as an exercise we can change the paths to write out figures.
Editing file paths with nano
Use nano to edit the file paths of the figures saved in
code/gdp_population.Rto match our new directory structure.Solution
nano code/gdp_population.REdit the lines in
code/gdp_population.Rwhere plots are saved:ggsave("figures/awesome_plot.jpg", width=6, height=4) ggsave("figures/awesome_histogram.jpg", width=6, height=4)
Glossary of terms
- root: the very top of the file system tree
- absolute path: the location of a specific file or directory starting from the root of the file system tree
-
relative path: the location of a specific file or directory starting from where you currently are in the file system tree
pwd: Print working directory - prints the absolute path from the root directory to the directory where you currently are.ls: List files - lists files in the current directory. You can provide a path to list files to another directory as well (ls [path]).cd [path]: Change directories - move to another folder.mkdir: Make directory - creates a new directory..: This will move you up one level in the file system treemv: Move - move a file to a new location (mv [file] [/path/to/new/location]) OR remaning a file (mv [oldfilename] [newfilename])less: - quick way to view a document without using a full text editorman: Manual - allows you to view the bash manual for another command (e.g.man ls)-h/--help: Help - argument that pulls up the help manual for a programnano: a user-friendly text editor*: Wildcard - matches zero of more characters in a filename
Key Points
A shell is a program whose primary purpose is to read commands and run other programs.
Tab completion can help you save a lot of time and frustration.
The shell’s main advantages are its support for automating repetitive tasks and its capacity to access network machines.
Information is stored in files, which are stored in directories (folders).
Directories nested in other directories for a directory tree.
cd [path]changes the current working directory.
ls [path]prints a listing of a specific file or directory.
lslists the current working directory.
pwdprints the user’s current working directory.
/is the root directory of the whole file system.A relative path specifies a location starting from the current location.
An absolute path specifies a location from the root of the file system.
Directory names in a path are separated with
/on Unix, but\on Windows.
..means ‘the directory above the current one’;.on its own means ‘the current directory’.
cp [old] [new]copies a file.
mkdir [path]creates a new directory.
mv [old] [new]moves (renames) a file or directory.
rm [path]removes (deletes) a file.
*matches zero or more characters in a filename.The shell does not have a trash bin — once something is deleted, it’s really gone.